PRODUCT TRAINING
Click here to book product training or call +44(0)1482 328053.
More info+44 (0)1482 328053
for Sales or Advice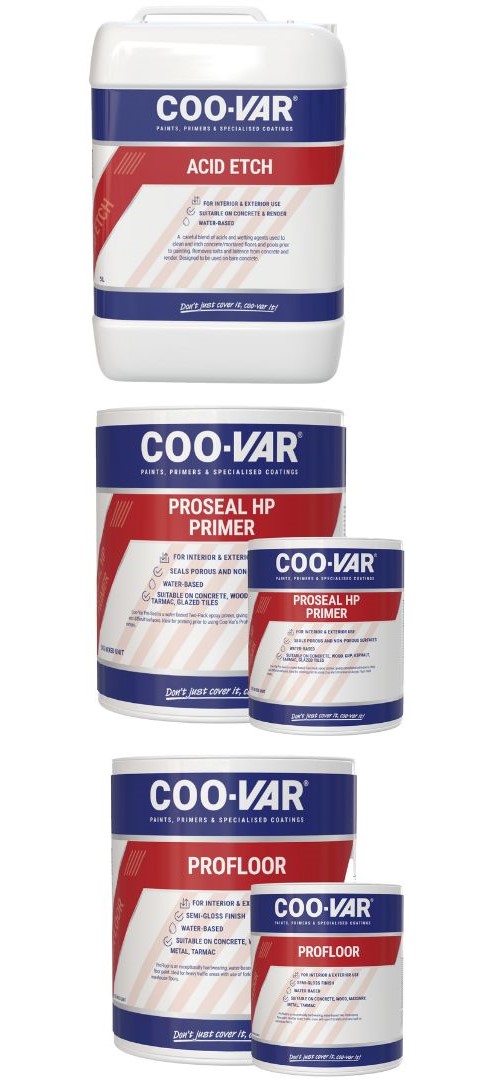
Follow the below stages from start to finish to achieve the best performance from our two pack epoxy coatings.
Please read before using two pack epoxy floor paints:
Drying times: There is a minimum and maximum overcoat time when using Coo-Var two pack epoxy floor paints.
Minimum Floor Temperature: It is important to ensure that the temperature of the substrate you are painting remains above 10 degrees C, and this is throughout the entire application and curing process.
Pot-life: Epoxy floor paints have a pot-life this varies between 20 minutes and 4 hours depending on the product. The curing process starts when the base and activator is mixed.
Before you start: Make sure the different epoxy coats (i.e., sealer or topcoat) are separated to ensure the correct activators are assigned to the correct paint base.
Step 1: Floor Preparation
Concrete New Unpainted: Leave to cure and dry fully, normally about three months (or 1 month per inch of screed) or check moisture content is below 14%. Thoroughly remove any scale or salts, (Coo-Var Acid Etch is a good way to do this) particularly essential on power floated or exceptionally smooth surfaces to provide a key.
Concrete Old Unpainted: Thoroughly clean and remove any grease or oil. This can be done with Coo-Var Universal Degreaser or Oil Remover. Coo-Var Acid Etch may then be used to remove any residual scale or salts. It may be necessary to clean and roughen the surface with an industrial abrading machine where the surface has become polished by long term use, is smooth or granolithic.
Previously Painted Concrete: Thoroughly clean and remove any loose/flaking material. Seal/etch prime any exposed areas as appropriate and ensure the previous paint is compatible with the selected Coo-Var floor coating (if the previous coating is not a two-pack epoxy this must be removed prior to using this system). The new paint must “key” to the old. This can be done by roughening smooth surfaces.
Cracks and Voids: If there are any holes or cracks in the concrete, they can be filled using Coo-Var two pack repair mortar. Let it dry for at least 3 hours before continuing.
Step 2: Floor prime with Coo-Var High Performance Epoxy Primer
Mix the two components separately before mixing with an electric drill fitted with a mixer paddle, add 500ml of water before mixing again. It is important to thoroughly mix the two components together (set a timer for three minutes).
This will ensure that the two components are evenly mixed and prevent any uncured product after application.
When applying the primer and topcoat we recommend using a short pile roller. You can choose to either pour the product into a roller tray before applying it with a roller or onto the floor in a thin line before rollering the epoxy out evenly at the correct spreading rate and thickness.
Tip: when cutting into the edges of the walls / pillars and posts/doorways with a hand paint brush first.
Back rolling in the other direction will avoid roller marks and achieve a better finish.
Step 3: Topcoat with either Coo-Var Profloor or Profloor Plus
Following the advised overcoat time, apply one or two coats of the Profloor or Profloor Plus.
Follow the same mixing and application as instructed for the High-Performance Primer when using the Profloor. When using the Profloor Plus do not add any water.
Optional (add an anti-slip aggregate) if required an anti-slip aggregate can be added into the first coat of Profloor or Profloor Plus. For best results the anti-slip option should be evenly scattered over the first coat of epoxy floor paint.